How to Build Your Own DIY Backyard Basketball Court
DIY GUIDE
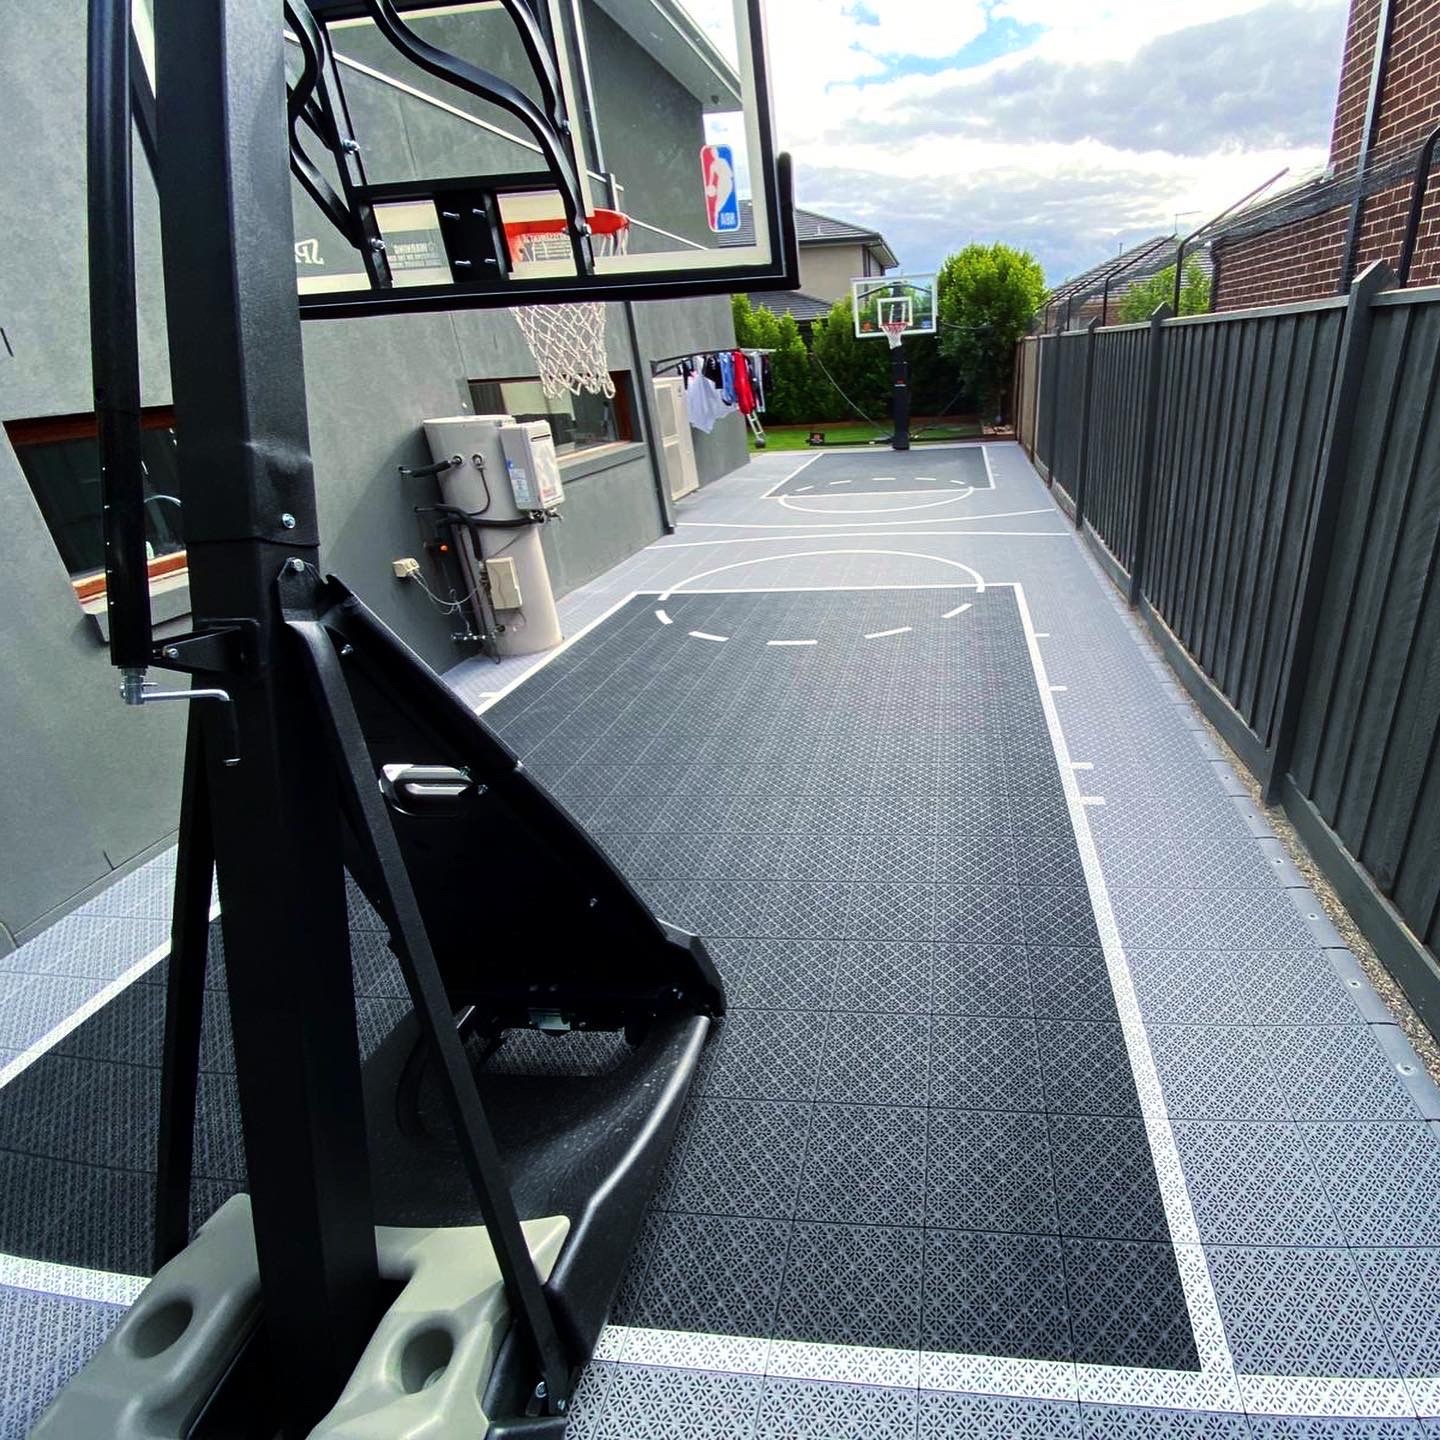
Inspired to build your own backyard basketball court?
If you're interested in DIY'ing a basketball court or having a local contractor install a court for you then you've come to the right place.
Last Updated 24th of April, 2023.
 1. Choose the Size and Location of Your Court
Ideally you’ll choose a location that is reasonably flat, to keep excavation needs to a minimum.
Recommended subsurface base: Concrete (100mm thick, 25MPA, Reinforced, Helictoper/smooth finish, Standard slope to allow water to drain off the slab)
We strongly recommend a concrete base for any new base being built for a MSF PRO sports court. Concrete provides by far the best longevity, performance and value over the long run and requires virtually no ongoing maintenance or repairs for many years. Other suitable bases include Pavers, Asphalt or Decking.
- Option 1: Have an elevated concrete slab & then fit your landscaping requirements around it.
- Option 2: Level the slab with the rest of your backyard. This option involves more excavation work/costs.
The size of a full size NBL court is identical to the FIBA regulation sized basketball court of 28m x 15m (420sqm), which is usually too large to fit into the average backyard. We recommend considering a half court, which can be customised to suit your space. Sizing can range from very small approx 4m x 6m (24sqm), 9m x 5m (45sqm), 10m x 7m (70sqm) to a 3X3 regulation half court of 15m x 11m (165sqm)... and everything in between!
Precise measurements and planning are crucial in order to end up with the best result.
 2. Purchase the Hoop & Sports Court Surface Tiles
The in-ground Hoop anchor kit should be installed during the concrete pour, so ensure you’ve ordered your Hoop in time to arrive before you schedule the concrete. Take note of the hoop's overhang in centimeters so you can plan accurate placement of the hoop anchor, free throw and three point lines.
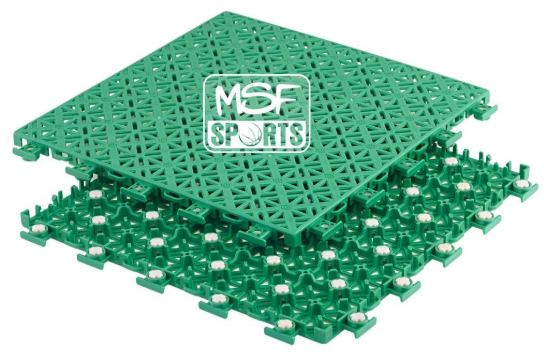
Surfacing your court with a specially designed synthetic sports surface such as Australia's #1 selling, top rated MSF Pro™ will not only produce an amazing looking result, but will also provide more accurate ball bounce, sound reduction and joints strain/injury minimisation.
3. Level the Ground
Prior to concreting, the space must be dug up and leveled. If you require the concrete to be flush with the surrounding ground then you must excavate 115mm below surface level to allow for the concrete slab (100mm) and sports surface tile (15mm). If you are opting for the elevated slab then you may not need to excavate but you do need to remove any grass and level the ground.
![]()
IMPORTANT SAFETY PRECAUTION: Before you dig, call 1100 (Australia) or your local utilities to rule out the presence of buried cables including power, water, gas and phone lines. Failure to do so could result in serious or fatal injury. Dial Before You Dig is a FREE national referral service designed to assist in preventing damage and disruption to Australia’s vast infrastructure networks which provide essential services we use every day.
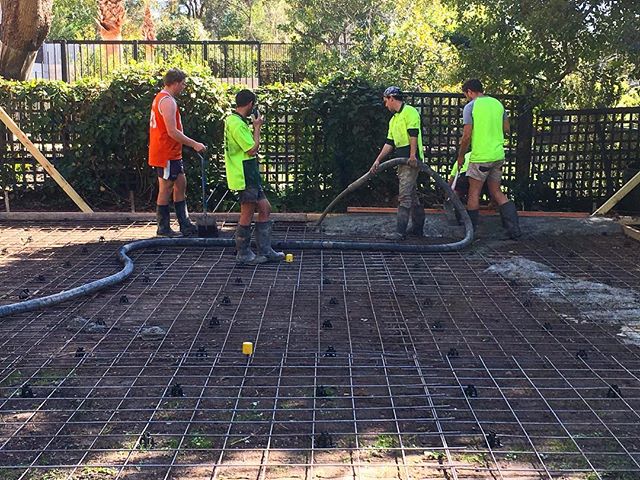
4. Pour a 100mm Concrete Slab
Prepare and pour a 100mm thick slab of concrete (25MPA, reinforced, standard slope, helicopter/smooth finish) matching your exact MSF PRO™ Court Design measurements. Ensure you have someone experienced with concrete slabs on hand for this step. Plan the concreting for when the weather is dry and allow for 72 hours to let the concrete set.
 It's recommended to install the hoop anchor at the same time as pouring the slab to save on time and costs. The recommended hole size for a hoop anchor system is approx 500mm x 500 mm and 1.2m deep. Please note: Always remember to closely follow the installation & safety instructions that come with your in-ground hoop.
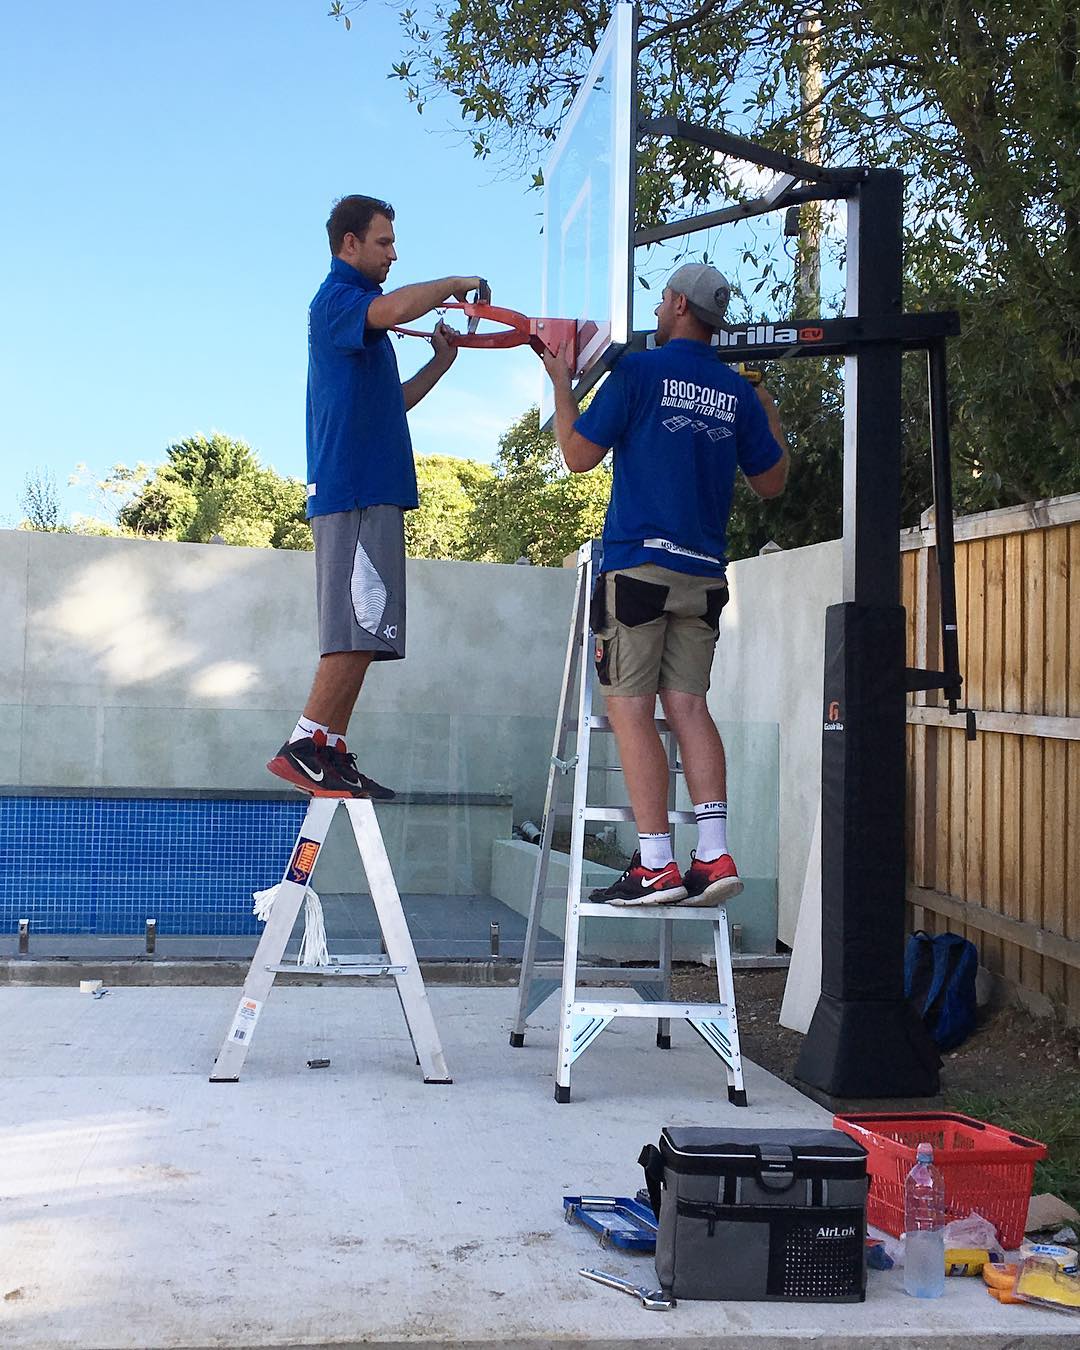
5. Install the Hoop
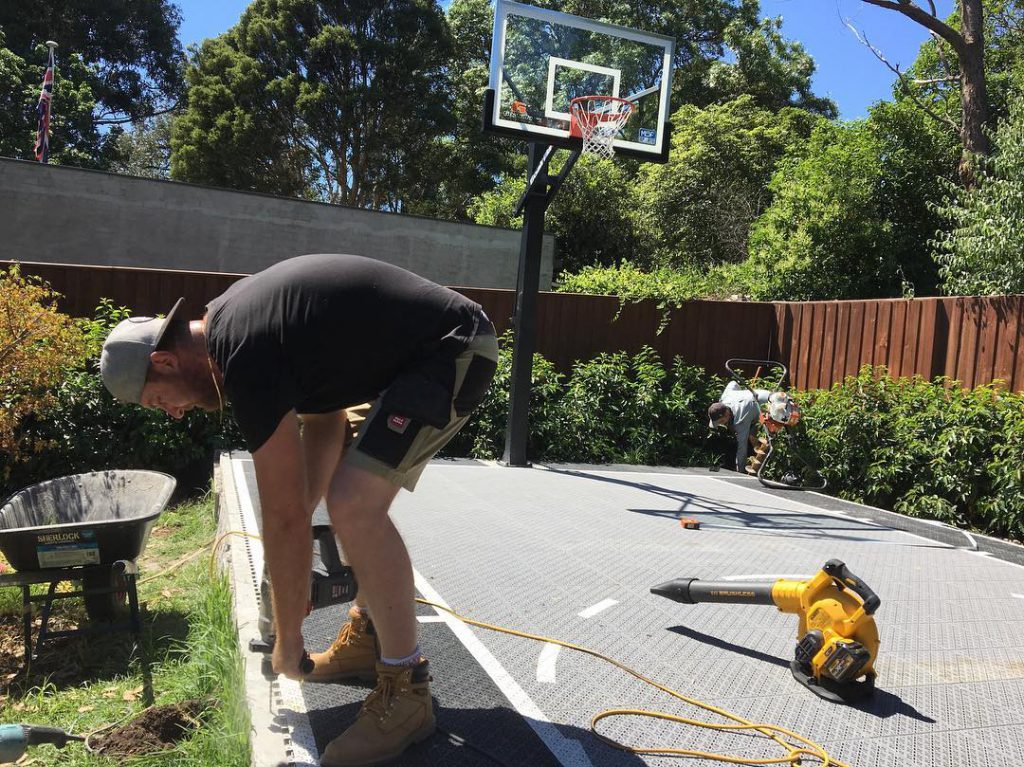
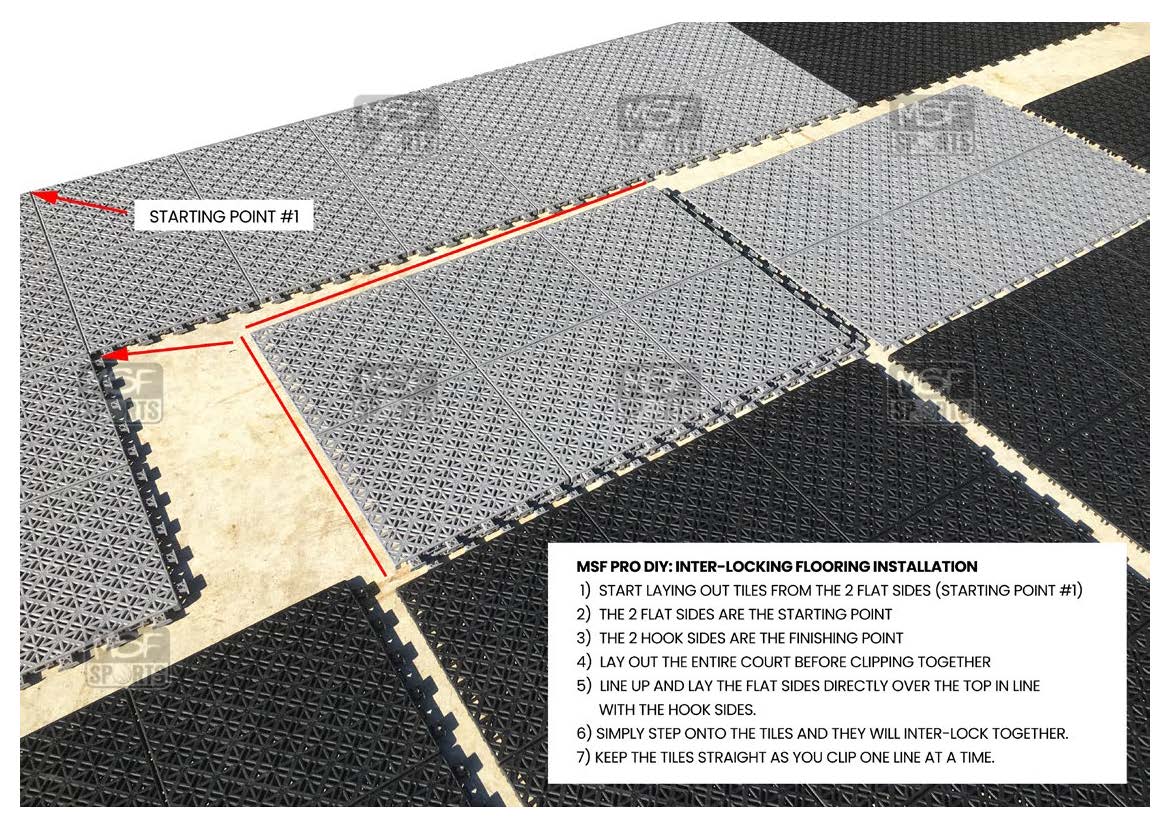
6. Install the Court Surface Tiles
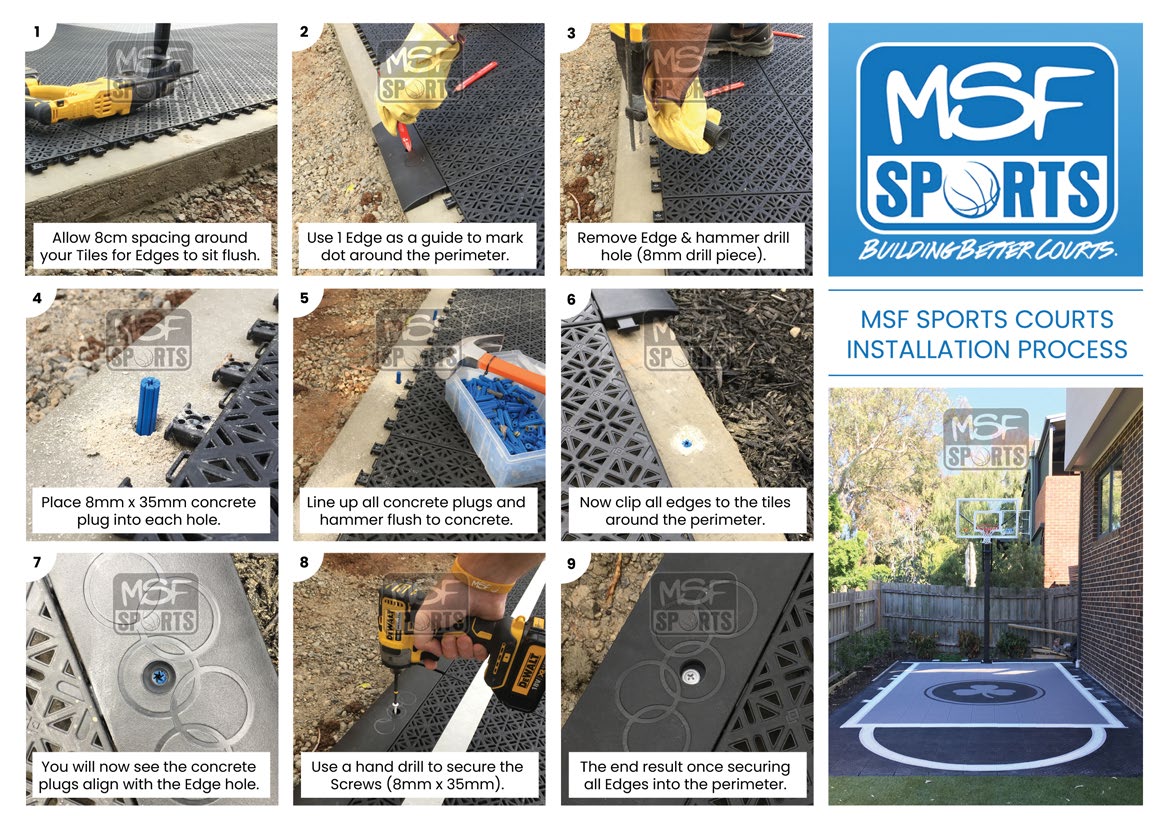
(PLEASE NOTE: we now use 7mm plugs, so you will require a 7mm drill bit for your hammer drill rather than 8mm mentioned in the photo above!)
- Once the concrete has had at least 72 hours to cure you can lay the surface tiles.
- When you lay out the court, be sure to align the side pieces flush with the edges of the concrete.
- Once tiles have been placed in a position you’re happy with, mark the screw spots of the edge pieces with a marker pen, remove edge pieces, and drill holes into the concrete using a hammer drill.
- Then hammer provided plugs into the drill holes, lay the edge pieces back into position and screw into the concrete, securing the edges of the court.
7. Paint the Line Markings
 You've got two options.....
- You can DIY your line markings by purchasing a basketball court line marking stencil kit, or study the regulation basketball court dimensions (FIBA, NBL, NBA, WNBA, etc) then get some masking tape, paint, rollers, chalk, string and tape measure and start measuring and masking. Watch some YouTube videos if you need inspiration.
- Get the professionals do it. MSF Sports offers free long lasting line markings (including basketball and other sports) on all DIY & Fully Installed MSF PRO™ Basketball & Multi-Sports Courts.
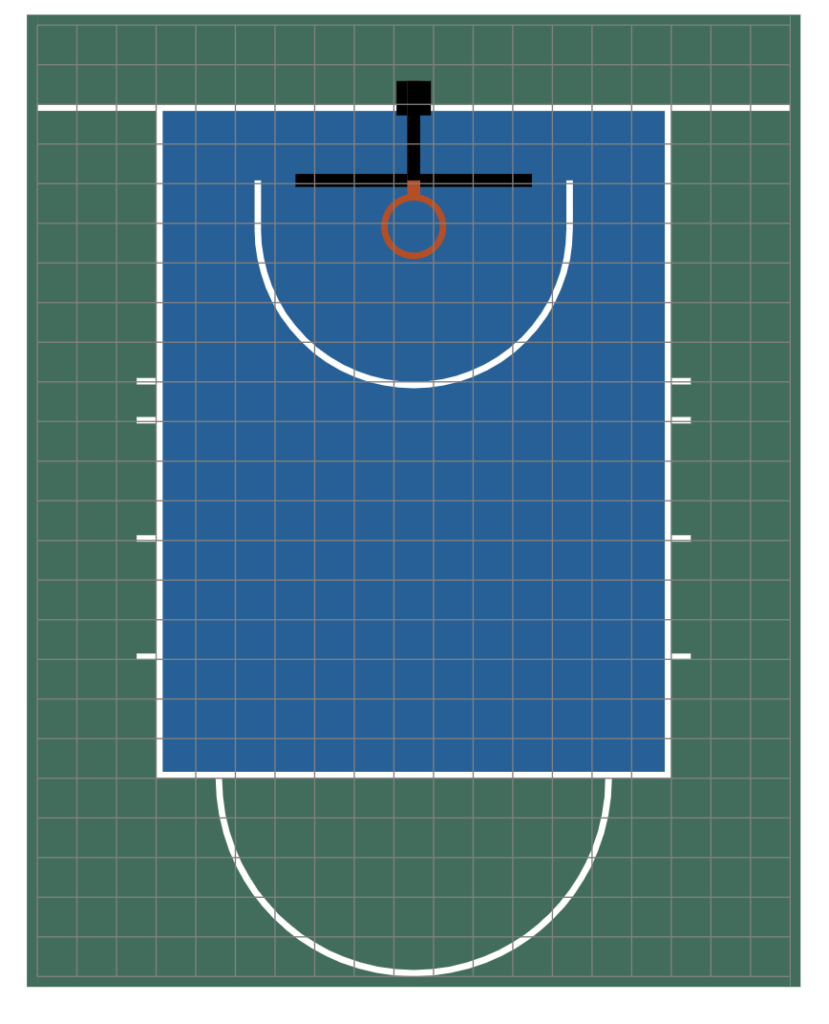
For DIY line markings you'll need to paint the following:
- The free-throw line: exactly 4.57 m (15 feet) away from the centre of the hoop and 12 feet long (you can use string from the centre of the hoop and where it hits corresponds to the centre).
- The free-throw lane: 12 feet by 19 feet (the top of the box is the free-throw line).
- The 3pt-line: 6.75m away from the centre of the basket. (And 6.60 m in the corners†)
- No-Charge Semi-Circle (Restricted Area): The no-charge line markings consist of a semi-circle with a radius of 1.25m measured from the point on the floor directly under the exact centre of the basket to the inner edge of the semi-circle. The semi-circle is joined to two parallel lines perpendicular to the endlines, 0.375m in length and ending 1.20m from the inner edge of the endline.
† The FIBA three-point line is 0.90 m from the sideline in a zone starting at the baseline and ending when it crosses the 6.75 m arc. The 6.60 m distance exists only at the points on the three-point line that are directly to the left and right of the basket centre.
Refer to this guide on Basketball Court Dimensions for all your basketball line-marking measurements for FIBA, NBL, NBA, WNBA, NCAA and more.
8. Accessorise
- Netting or fencing can help contain rogue balls from breaking windows or disappearing over the neighbour’s fence. It’s best to plan for this before pouring the concrete foundation, so that you can set netting poles into the concrete, instead of having to bolt them into the concrete. Netting can set you back in the range of $2000-$3500.
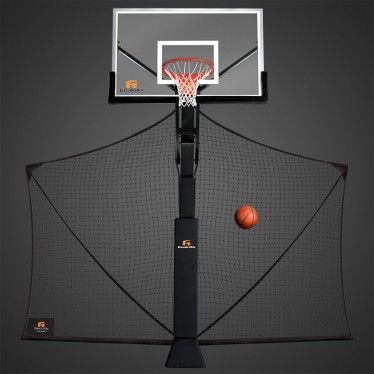
- An alternative more cost effective netting option is to purchase the Goalrilla Yard Guard for approx $450 installed (for Goalrilla Hoop) or the MegaSlam Net Protect (for MegaSlam Hoop) for approx $400 installed.
- Painting a custom logo or artwork in the key can add wow-factor to the court. Use a stencil or have a professional do this for you. For example, a single colour 2m x 2m logo painted in the key will cost approx. $550.
- A ball return system helps cut down on wasted time fetching the ball after each shot, increasing the impact of training time when practising by yourself. There are simple plastic attachment options for under $100 as well as professional smart device connected automatic ball return machines that can cost between $10k-$15k.
Inspired to get your own backyard basketball court but would rather have professionals install it?
MSF Sports is Australia's leading supplier of Basketball Court tiles to DIY installers.
We supply DIY courts and hoops Australia-wide.
Get in touch for a quote.
Want a quote for a MSF PRO basketball court?
Click here to get a Basketball Court quote
Australia's #1 Multi Sports Court : MSF PRO
MSF Sports Pty Ltd
Call 1800 COURTS | Get a Free Court Design & Quote
Please note: This guide is for informational purposes only. MSF Sports accepts no responsibility for errors or omissions in relation to any information published on this website or other channels.